Mastering OpenVPN Privacy Setup: A Comprehensive Guide for Secure BTC Mixing
Mastering OpenVPN Privacy Setup: A Comprehensive Guide for Secure BTC Mixing
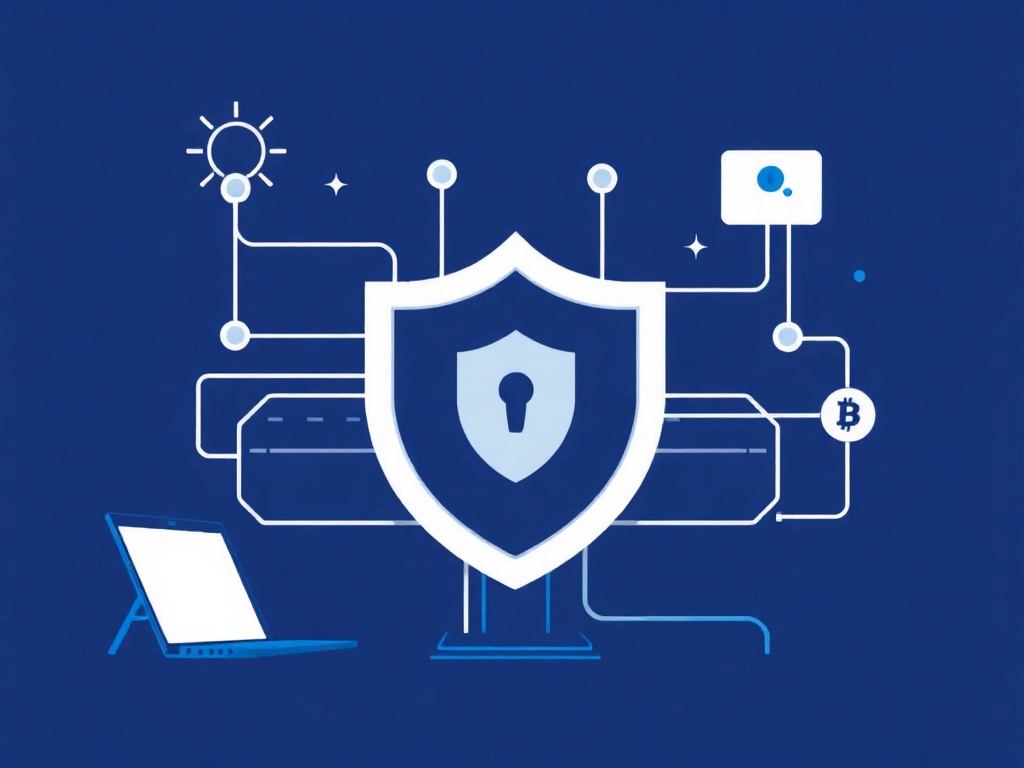
In the evolving landscape of cryptocurrency transactions, maintaining privacy has become a paramount concern for users engaged in Bitcoin mixing or btcmixer_en2 activities. OpenVPN, a robust and widely trusted open-source VPN solution, offers a powerful way to enhance privacy by encrypting your internet traffic and masking your IP address. This guide provides a detailed walkthrough of setting up OpenVPN for privacy-focused use cases, particularly in the context of Bitcoin mixing and anonymity preservation.
Whether you're a privacy advocate, a cryptocurrency trader, or someone exploring the btcmixer_en2 ecosystem, understanding how to configure OpenVPN correctly can significantly reduce your digital footprint. We’ll cover everything from server selection and client configuration to advanced security practices and troubleshooting common issues. By the end of this article, you’ll have a fully operational OpenVPN privacy setup tailored for secure Bitcoin transactions.
Why OpenVPN is Essential for Privacy in Bitcoin Mixing
Before diving into the technical setup, it’s important to understand why OpenVPN is a preferred choice for privacy-conscious users, especially those involved in Bitcoin mixing or using services like btcmixer_en2. Unlike many commercial VPNs, OpenVPN is open-source, meaning its code is publicly auditable and free from hidden backdoors. This transparency is crucial when handling sensitive financial data.
The Role of VPNs in Cryptocurrency Privacy
Bitcoin transactions are inherently public on the blockchain, but your identity doesn’t have to be. When you use a Bitcoin mixer or tumbler, you’re attempting to sever the link between your sending address and receiving address. However, if your internet connection isn’t secure, third parties—such as your ISP, government agencies, or malicious actors—can monitor your activity and potentially link your IP address to your transactions.
A VPN like OpenVPN acts as a secure tunnel between your device and the internet. By routing all your traffic through an encrypted server, it prevents eavesdroppers from seeing your real IP or the contents of your communication. This is particularly important when accessing Bitcoin mixing services, as it adds an extra layer of anonymity beyond what the mixer itself provides.
OpenVPN vs. Other VPN Protocols for Privacy
While there are several VPN protocols available (e.g., WireGuard, IPSec, L2TP), OpenVPN stands out for several reasons:
- Strong Encryption: Supports AES-256, one of the most secure encryption standards available.
- Flexibility: Works across multiple platforms (Windows, macOS, Linux, Android, iOS) and can be configured for both TCP and UDP.
- Customizable: Allows fine-tuning of security settings, including cipher suites and TLS versions.
- Widely Supported: Most VPN providers and self-hosted solutions support OpenVPN, making it easier to find compatible servers.
In contrast, protocols like WireGuard offer faster speeds but have a smaller attack surface and fewer configuration options, which may not suit users requiring maximum privacy. For OpenVPN privacy setup in Bitcoin mixing, this flexibility and robustness make it an ideal choice.
Common Threats Mitigated by OpenVPN
When engaging in Bitcoin mixing or using btcmixer_en2, you face several privacy risks:
- IP Address Leaks: Without a VPN, your real IP is visible to the mixer and any intermediaries.
- DNS Leaks: Your DNS queries can reveal the websites you visit, including Bitcoin mixing services.
- Browser Fingerprinting: Websites can collect data about your browser and device configuration to track you across sessions.
- Man-in-the-Middle Attacks: Attackers can intercept unencrypted traffic to steal credentials or transaction data.
An OpenVPN privacy setup addresses these threats by encrypting all traffic, preventing DNS leaks, and ensuring your real IP remains hidden. This creates a secure foundation for interacting with Bitcoin mixing services without exposing your identity.
Choosing the Right OpenVPN Server for Bitcoin Mixing
Not all OpenVPN servers are created equal, especially when your goal is to maximize privacy during Bitcoin mixing. The server you choose can impact your anonymity, connection speed, and overall security. Below, we’ll explore key factors to consider when selecting an OpenVPN server for OpenVPN privacy setup in the context of btcmixer_en2.
Server Location: Jurisdiction Matters
The physical location of your VPN server plays a critical role in your privacy. Some countries have strict data retention laws or cooperate heavily with law enforcement, which could compromise your anonymity. When selecting a server for Bitcoin mixing, prioritize locations with strong privacy laws and minimal surveillance cooperation.
Recommended jurisdictions for OpenVPN servers include:
- Switzerland: Known for strict privacy laws and neutrality.
- Iceland: Offers strong protections for data privacy and freedom of speech.
- Panama: No data retention laws and favorable for VPN operations.
- Seychelles: Hosts several privacy-focused VPN providers with no mandatory logging.
Avoid servers in countries like the U.S., U.K., or Australia, which are part of intelligence-sharing alliances (e.g., Five Eyes). These jurisdictions may compel VPN providers to log or share user data, undermining your privacy.
Server Provider: Trust and Transparency
When setting up your own OpenVPN server or choosing a provider, transparency is key. Reputable VPN providers that support OpenVPN should:
- Have a No-Logs Policy: Explicitly state that they do not store user activity logs.
- Undergo Independent Audits: Regular security audits by third parties to verify claims.
- Accept Anonymous Payments: Allow cryptocurrency payments (e.g., Bitcoin, Monero) to avoid linking your identity to the VPN service.
- Offer OpenVPN Configuration Files: Provide pre-configured .ovpn files for easy setup.
Some recommended OpenVPN-friendly VPN providers for privacy include:
- ProtonVPN: Based in Switzerland, no logs, accepts Bitcoin.
- Mullvad: Based in Sweden (but no logs), accepts Monero and Bitcoin.
- IVPN: Based in Gibraltar, strong privacy focus, accepts cryptocurrency.
- AirVPN: Open-source VPN with strong OpenVPN support and no logs.
If you prefer self-hosting, you can set up your own OpenVPN server on a VPS provider like:
- Hetzner (Germany): Good privacy policies and affordable VPS options.
- Linode (U.S.): Offers privacy-focused plans and supports Bitcoin payments.
- Vultr (Global): Allows anonymous sign-ups with cryptocurrency.
Server Configuration: Optimizing for Privacy
Once you’ve selected a server location and provider, the next step is configuring the OpenVPN server for maximum privacy. This involves adjusting settings to minimize logging, prevent leaks, and ensure robust encryption.
Key configuration options to consider:
- Disable Logging: Ensure your OpenVPN server is configured with
log-append /dev/nullor similar to prevent logging of connections. - Use Strong Ciphers: Configure OpenVPN to use AES-256-GCM for encryption and TLS 1.2 or higher for handshake.
- Enable Perfect Forward Secrecy (PFS): Use
tls-cipher TLS-ECDHE-ECDSA-WITH-AES-256-GCM-SHA384to ensure session keys are not compromised even if long-term keys are. - Restrict Protocols: Use UDP for faster speeds (unless TCP is required for firewall compatibility) and disable weak protocols like SSLv3.
- Kill Switch: Implement a kill switch to block all traffic if the VPN connection drops, preventing accidental IP leaks.
For a self-hosted OpenVPN server, you can use tools like PiVPN (for Raspberry Pi) or OpenVPN Access Server to simplify setup. These tools provide pre-configured options optimized for privacy.
Testing Server Reliability and Privacy
Before relying on your OpenVPN server for Bitcoin mixing, it’s essential to test its reliability and privacy. Use the following methods to verify your setup:
- IP Leak Test: Visit ipleak.net to check for IP, DNS, or WebRTC leaks. Ensure your real IP is not exposed.
- DNS Leak Test: Use dnsleaktest.com to confirm that all DNS queries are routed through the VPN.
- WebRTC Leak Test: Check for WebRTC leaks using browserleaks.com/webrtc, which can reveal your real IP even when using a VPN.
- Speed Test: Run a speed test to ensure the VPN doesn’t significantly degrade your connection, which could impact your ability to use Bitcoin mixing services smoothly.
- Torrent IP Test: If you’re using the VPN for general privacy, test with a torrent client to ensure your IP isn’t exposed during P2P activity.
If any leaks are detected, revisit your OpenVPN configuration or server settings to address the issue. A secure OpenVPN privacy setup should pass all these tests without exposing your real IP or DNS queries.
Step-by-Step Guide to Setting Up OpenVPN for Privacy
Now that you understand the importance of server selection and configuration, let’s walk through the process of setting up OpenVPN for a secure OpenVPN privacy setup. This guide covers both client-side and server-side setup, with options for self-hosting or using a third-party provider.
Option 1: Using a Third-Party VPN Provider with OpenVPN
This is the easiest method for most users, as it requires minimal technical knowledge. Follow these steps to configure OpenVPN with a privacy-focused provider:
Step 1: Choose a Provider and Sign Up Anonymously
Select a provider that supports OpenVPN and accepts anonymous payments (e.g., Bitcoin, Monero). Sign up using an anonymous email (e.g., ProtonMail) and avoid providing personal details. Pay with cryptocurrency to further obscure your identity.
Step 2: Download OpenVPN Configuration Files
Most providers offer OpenVPN configuration files for different server locations. Download the files for the servers you intend to use. These files typically have a .ovpn extension and contain the server address, port, and encryption settings.
Step 3: Install OpenVPN Client Software
Download and install the OpenVPN client for your operating system:
- Windows: Download from OpenVPN Community Downloads.
- macOS: Use Tunnelblick (tunnelblick.net) or the official OpenVPN client.
- Linux: Install via package manager (e.g.,
sudo apt install openvpnfor Debian/Ubuntu). - Android/iOS: Use the OpenVPN Connect app from the respective app stores.
Step 4: Import Configuration Files
Launch the OpenVPN client and import the configuration files you downloaded. For most clients, this involves:
- Click "Import" or "Add Profile."
- Select the
.ovpnfile from your downloads. - Enter your username and password (if required by the provider).
- Save the profile.
Step 5: Connect to the VPN
Select the server profile and click "Connect." Once connected, verify your IP address has changed by visiting whatismyipaddress.com. Ensure the new IP is in the server’s location and that no leaks are detected.
Step 6: Enable Kill Switch (Optional but Recommended)
To prevent IP leaks if the VPN disconnects, enable the kill switch feature in your OpenVPN client. In OpenVPN Connect (Windows/macOS), this is called "Network Lock." For Linux, you can use iptables rules to block traffic when the VPN is down.
Option 2: Self-Hosting OpenVPN on a VPS
For users who prefer full control over their VPN server, self-hosting OpenVPN on a VPS is a viable option. This method is more advanced but offers greater customization and privacy. Below is a step-by-step guide using a Linux VPS (e.g., Ubuntu 22.04).
Step 1: Choose and Set Up a VPS
Select a VPS provider with a strong privacy policy and pay anonymously with cryptocurrency. Recommended providers include Hetzner, Linode, or Vultr. Once your VPS is provisioned, SSH into it:
ssh root@your-vps-ipStep 2: Install OpenVPN and Easy-RSA
Update your system and install OpenVPN along with Easy-RSA (for certificate management):
sudo apt update && sudo apt upgrade -y
sudo apt install openvpn easy-rsa -y
Step 3: Set Up the Certificate Authority (CA)
Easy-RSA will help you generate certificates for your OpenVPN server and clients. Start by setting up the CA:
make-cadir ~/openvpn-ca
cd ~/openvpn-ca
Edit the vars file to customize your CA settings (e.g., country, organization):
nano varsThen, initialize the PKI and build the CA:
./easyrsa init-pki
./easyrsa build-ca
Follow the prompts to set a strong password for your CA private key.
Step 4: Generate Server Certificate and Key
Generate a certificate and key for your OpenVPN server:
./easyrsa gen-req server nopass
./easyrsa sign-req server server
Copy the generated files to the OpenVPN directory:
sudo cp ~/openvpn-ca/pki/private/server.key /etc/openvpn/server/
sudo cp ~/openvpn-ca/pki/issued/server.crt /etc/openvpn/server/
sudo cp ~/openvpn-ca/pki/ca.crt /etc/openvpn/server/
Step 5: Configure the OpenVPN Server
Create a server configuration file:
sudo nano /etc/openvpn/server/server.confAdd the following configuration (adjust as needed for your setup):
port 1194
proto udp
dev tun
ca /etc/openvpn/server/ca.crt
cert /etc/openvpn/server/server.crt
key /etc/openvpn/server/server.key
dh none
server 10.8.0.0 255.255.255.0
push "redirect-gateway def1 bypass-dhcp"
push "dhcp-option DNS 1.1.1.1"
push "dhcp-option DNS 8.8.8.8"
keepalive 10 120
tls-crypt /etc/openvpn/server/ta.key
cipher AES-256-GCM
auth SHA256
user nobody
group nogroup
persist-key
persist-tun
status /var/log/openvpn-status.log
log /var/log/openvpn.log
verb 3
Save the file and generate the tls-crypt key:
sudo openvpn
 Robert Hayes
DeFi & Web3 Analyst
Robert Hayes
DeFi & Web3 Analyst
As a DeFi and Web3 analyst, I’ve observed that privacy infrastructure remains a critical yet often overlooked component of secure digital interactions—especially in an era where on-chain transparency is both a strength and a vulnerability. OpenVPN, despite its age, remains a robust choice for users seeking to anonymize their traffic without sacrificing performance. However, its effectiveness hinges entirely on proper configuration. A misconfigured OpenVPN privacy setup can introduce latency, leak DNS queries, or even expose metadata that undermines anonymity. For Web3 participants—whether they’re yield farmers, governance token holders, or privacy-conscious developers—the difference between a secure tunnel and a compromised one often comes down to cipher selection, certificate management, and DNS handling. I’ve seen too many users default to weak encryption (like AES-128-CBC) or neglect to enable perfect forward secrecy, leaving their historical traffic vulnerable to retroactive decryption. The key is treating OpenVPN not as a plug-and-play tool, but as a tunable privacy layer that must be hardened against adversaries.
From a practical standpoint, the most overlooked aspect of an OpenVPN privacy setup is its interaction with the broader network stack. Many users deploy OpenVPN on a VPS without considering the host’s logging policies or jurisdiction—both of which can nullify the privacy benefits. I recommend pairing OpenVPN with a no-logs provider, enforcing TLS 1.3, and disabling compression to prevent CRIME attacks. For DeFi users, this means ensuring that their VPN exit node isn’t located in a jurisdiction with invasive surveillance laws (e.g., Five Eyes countries). Additionally, integrating OpenVPN with a privacy-focused DNS resolver like NextDNS or Quad9, and routing all traffic through the VPN (not just selective ports), closes gaps that even sophisticated adversaries exploit. In Web3, where wallet addresses and transaction patterns can reveal identity, a well-architected OpenVPN privacy setup isn’t just about hiding traffic—it’s about preserving the pseudonymity that underpins decentralized systems.